Fully open the door to get clear access to the bill validator.
The NV9 is usually above the coin changer and is secured with a metal frame. Before starting, unplug the power cord or switch off the machine. Caution: Working on live parts can be dangerous!
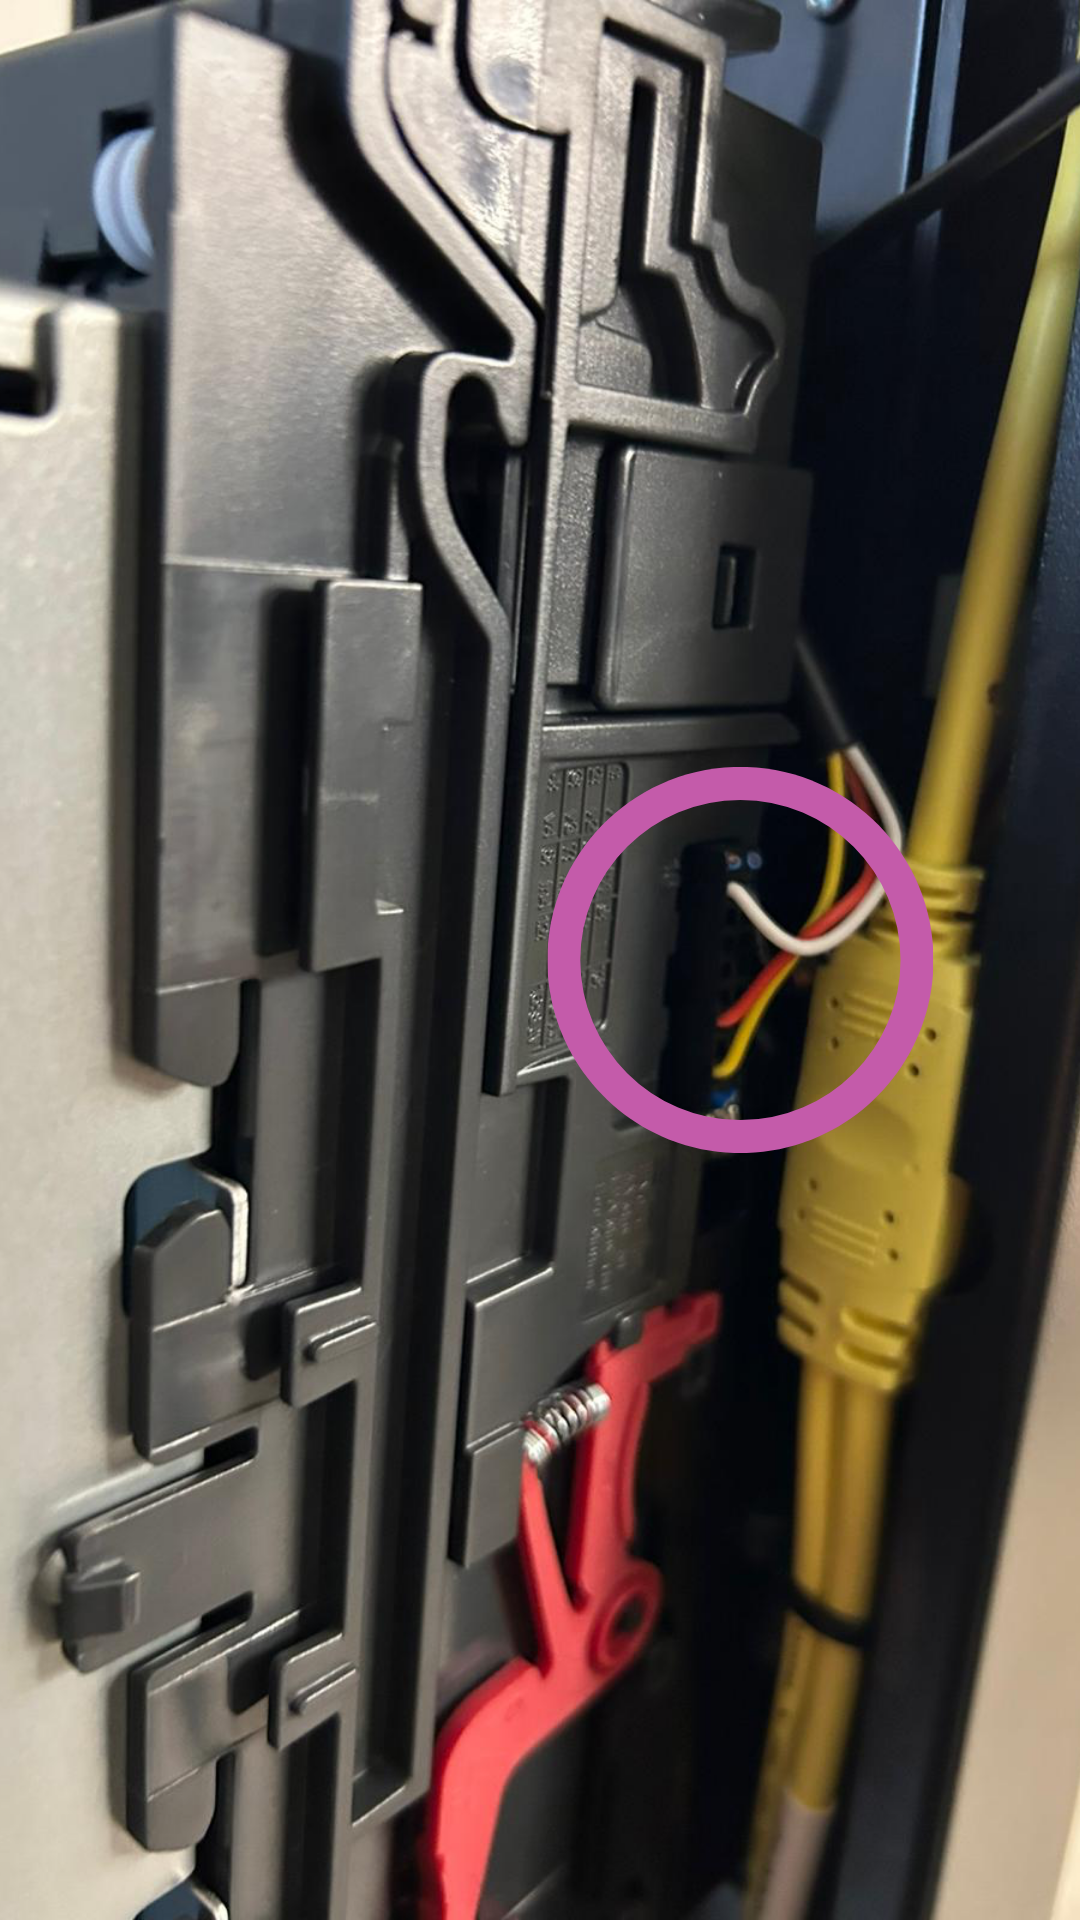
(The picture shows the connection area)
Carefully pull off the multi-core plug connection (usually black, with yellow/white/red/black cables). The plug is secured by a small tab — gently press this in and then pull straight off.
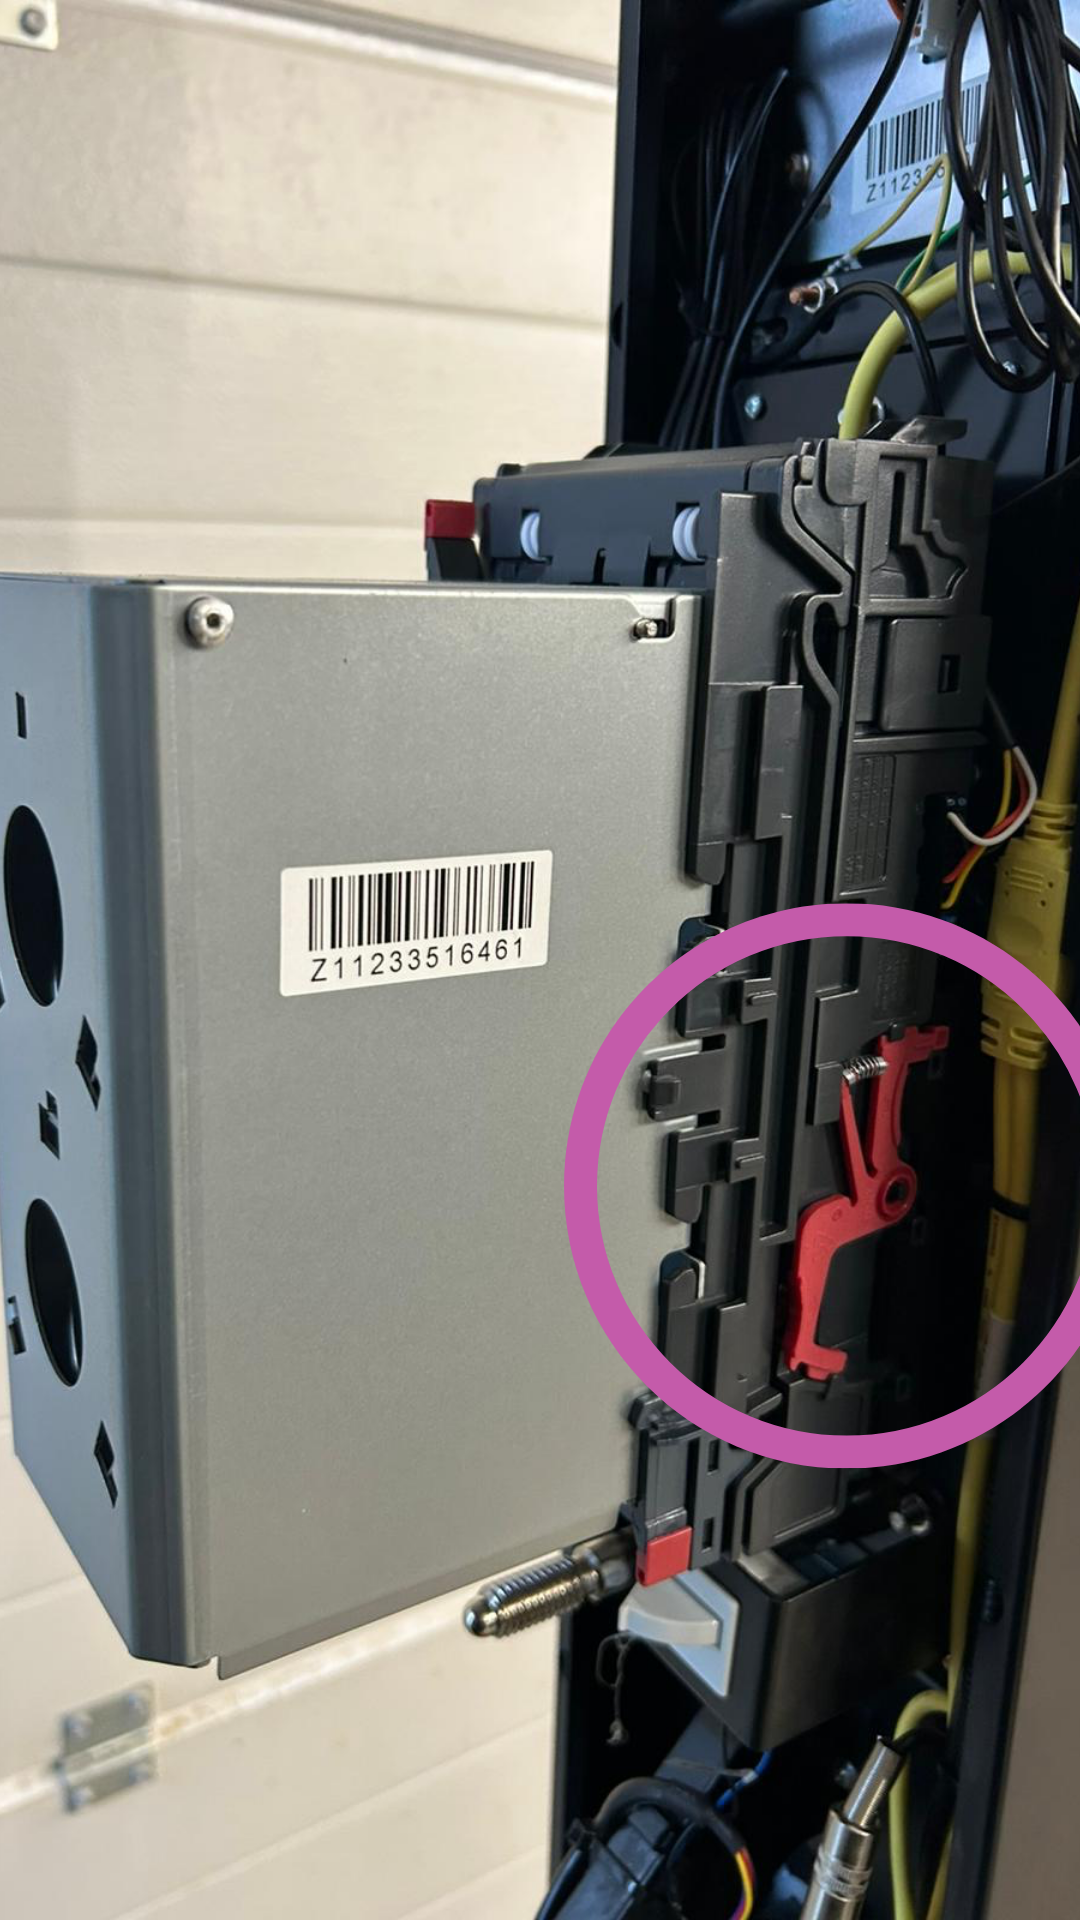
Pull the red locking lever down on both sides.
This will unlock the bill validator from its mount.
Then pull the NV9 straight out to the front.
Slide the new NV9 into the upper guide until it audibly clicks into place.
Make sure the red lever locks automatically again and the device is sitting firmly.
Plug the connector you separated earlier back into the socket (same polarity).
Press lightly until the connector audibly clicks into place.
Neatly arrange the cable so nothing gets pinched.
Restore power to the machines.
When starting up, the NV9 runs a self-test (LED blinks briefly, motor noise audible).
Insert a bill to test:
If it is pulled in and recognized correctly → 
If it is rejected immediately → check cable connection or firmware
 Note
NoteIf the new NV9 isn't detected:
Check if the protocol (MDB/CCTalk/Executive) matches the machine.
Make sure the firmware version and currency setting (EUR) are correct.
If needed, run “Learning Mode” or “Firmware Update” (possible via ITL-USB-Programmer).