Required tools
Phillips screwdriver
if needed, cable tie tool or side cutters
Flashlight
 Open the front door & disconnect power from the device
Open the vending machine door completely to access the coin changer.
The coin changer is usually on the right behind the coin unit / under the card payment module.
Before starting unplug the power cord or switch off the vending machine.
→ Never work on live parts!
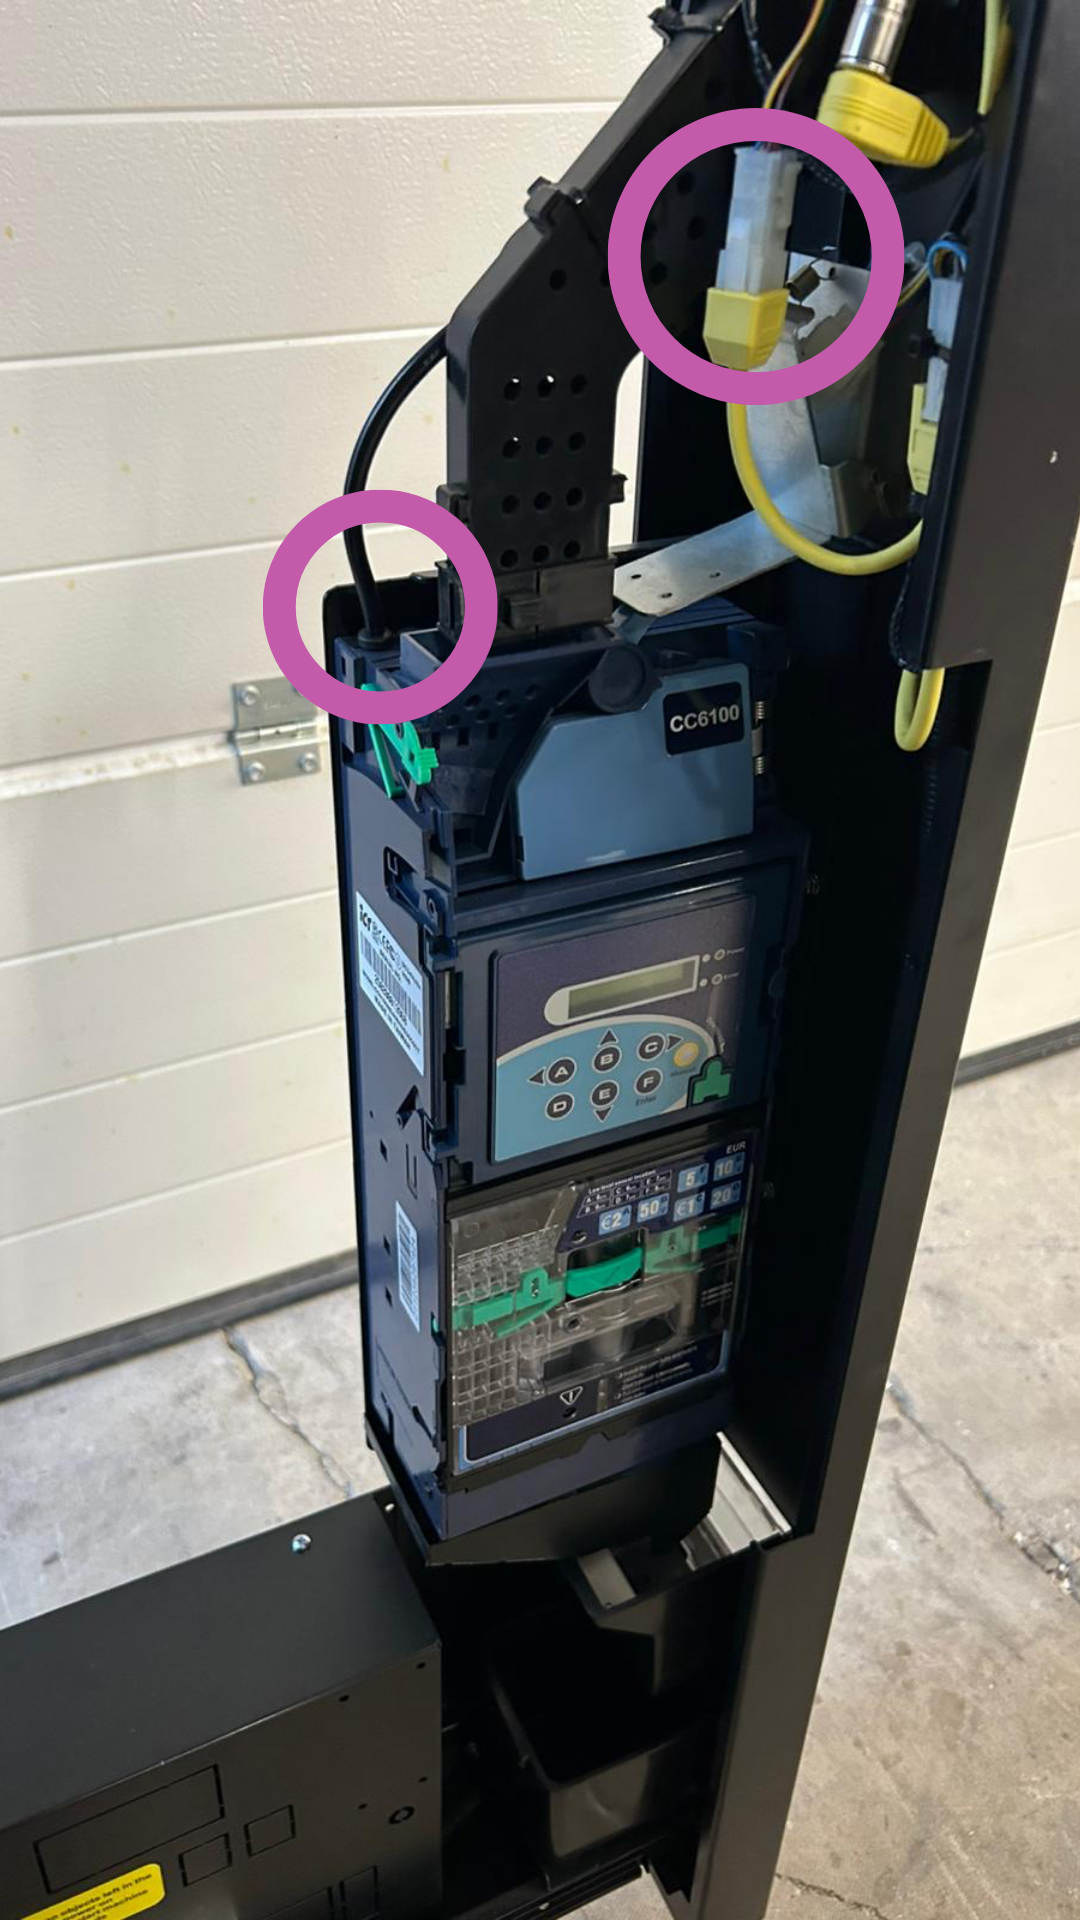
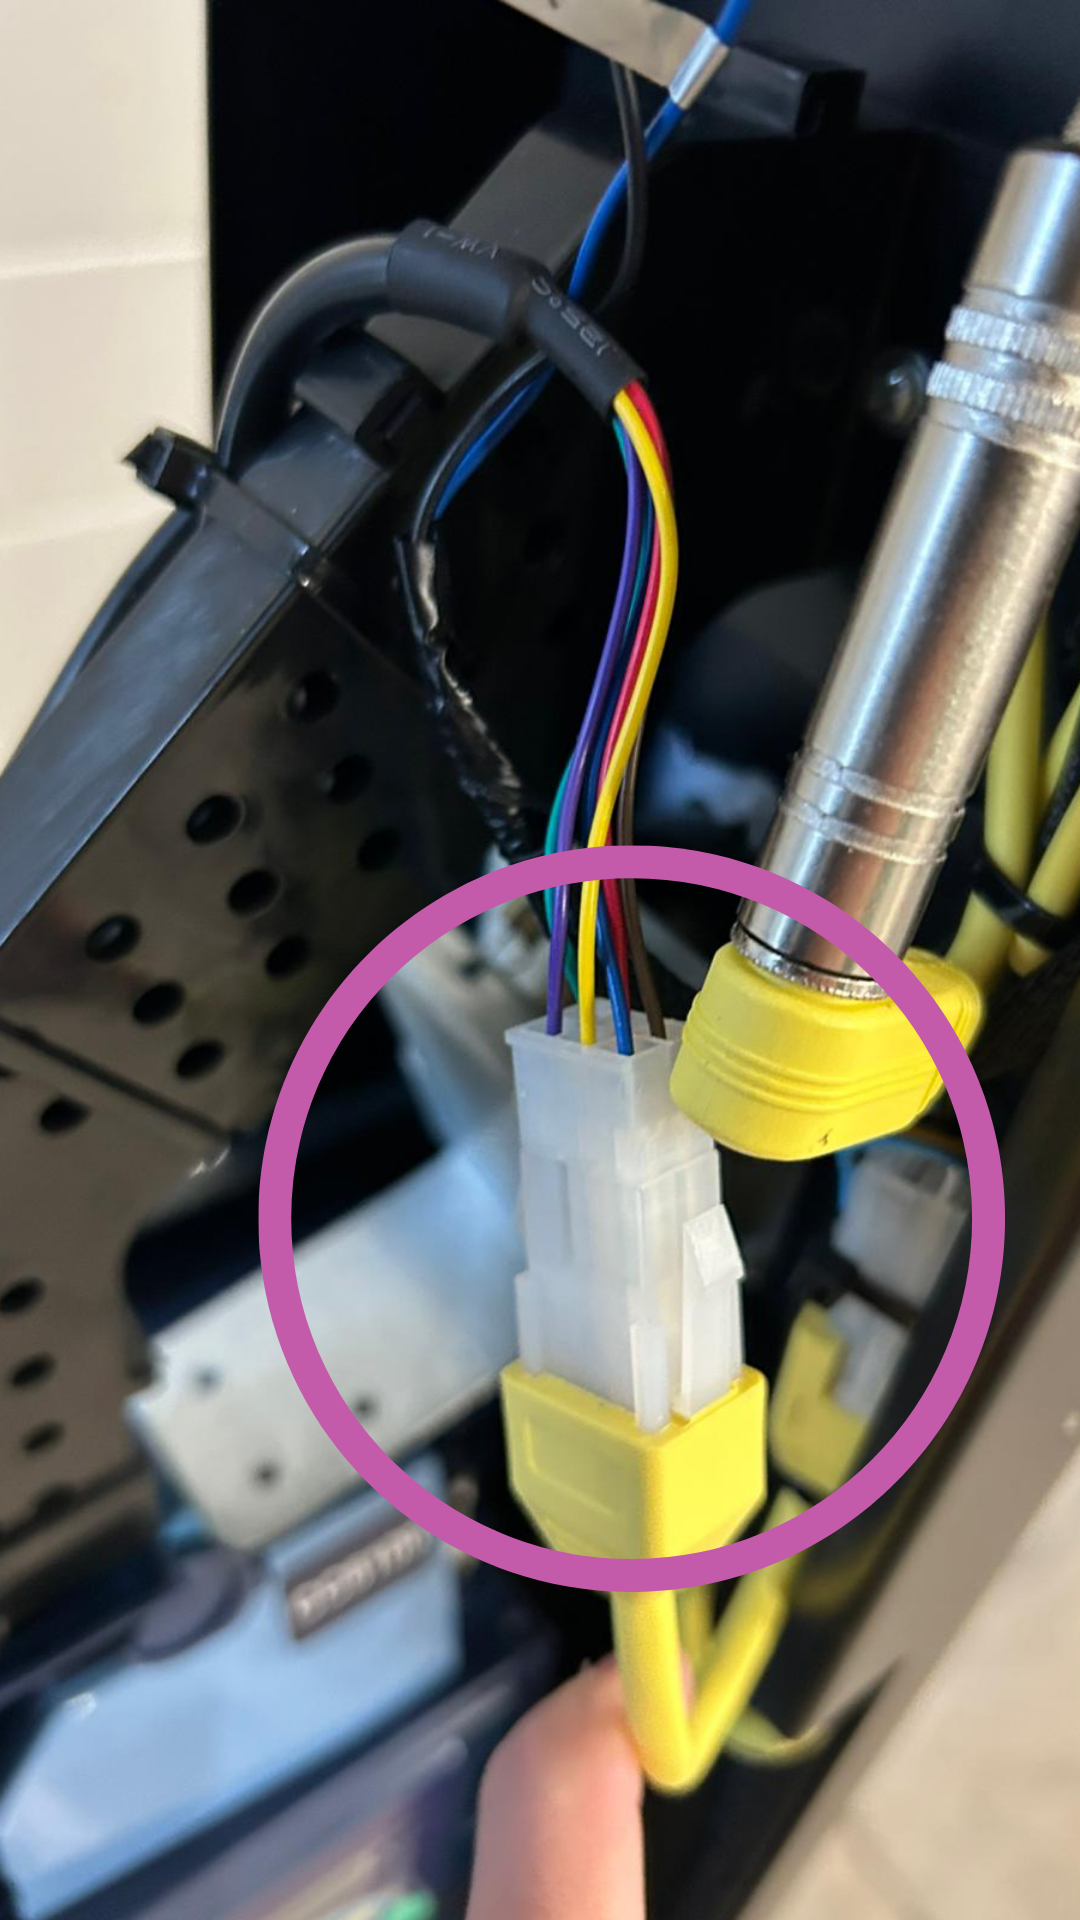
 Disconnect plug connections
Marked on image 1 & 2:
Yellow plug (main supply) disconnect (MDB bus or Executive connector)
→ Plugs have locking latches – gently press them together and pull off, do not pull on the cables
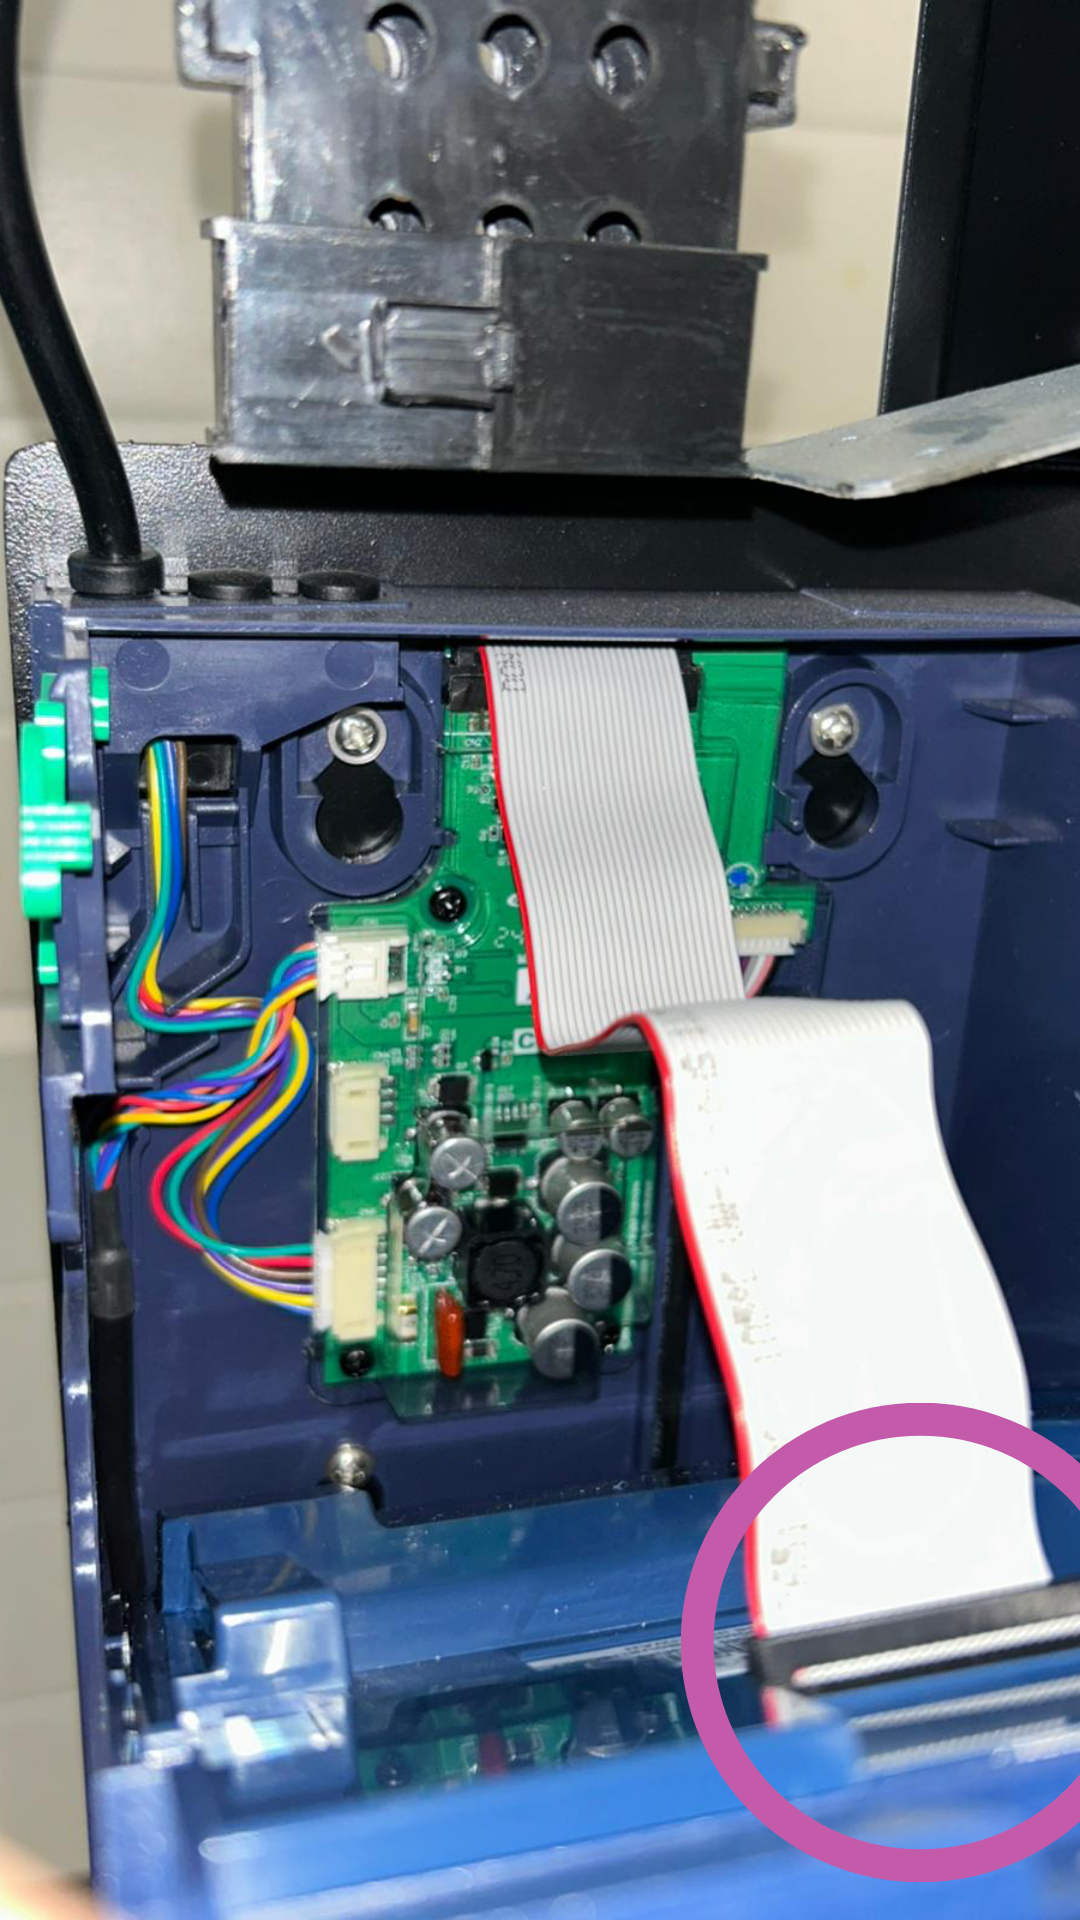
 Disconnect flat ribbon cable
(Image 3)
Gently pull the flat ribbon cable off the front board.
Tip: Pull the cable straight out, don’t twist it.
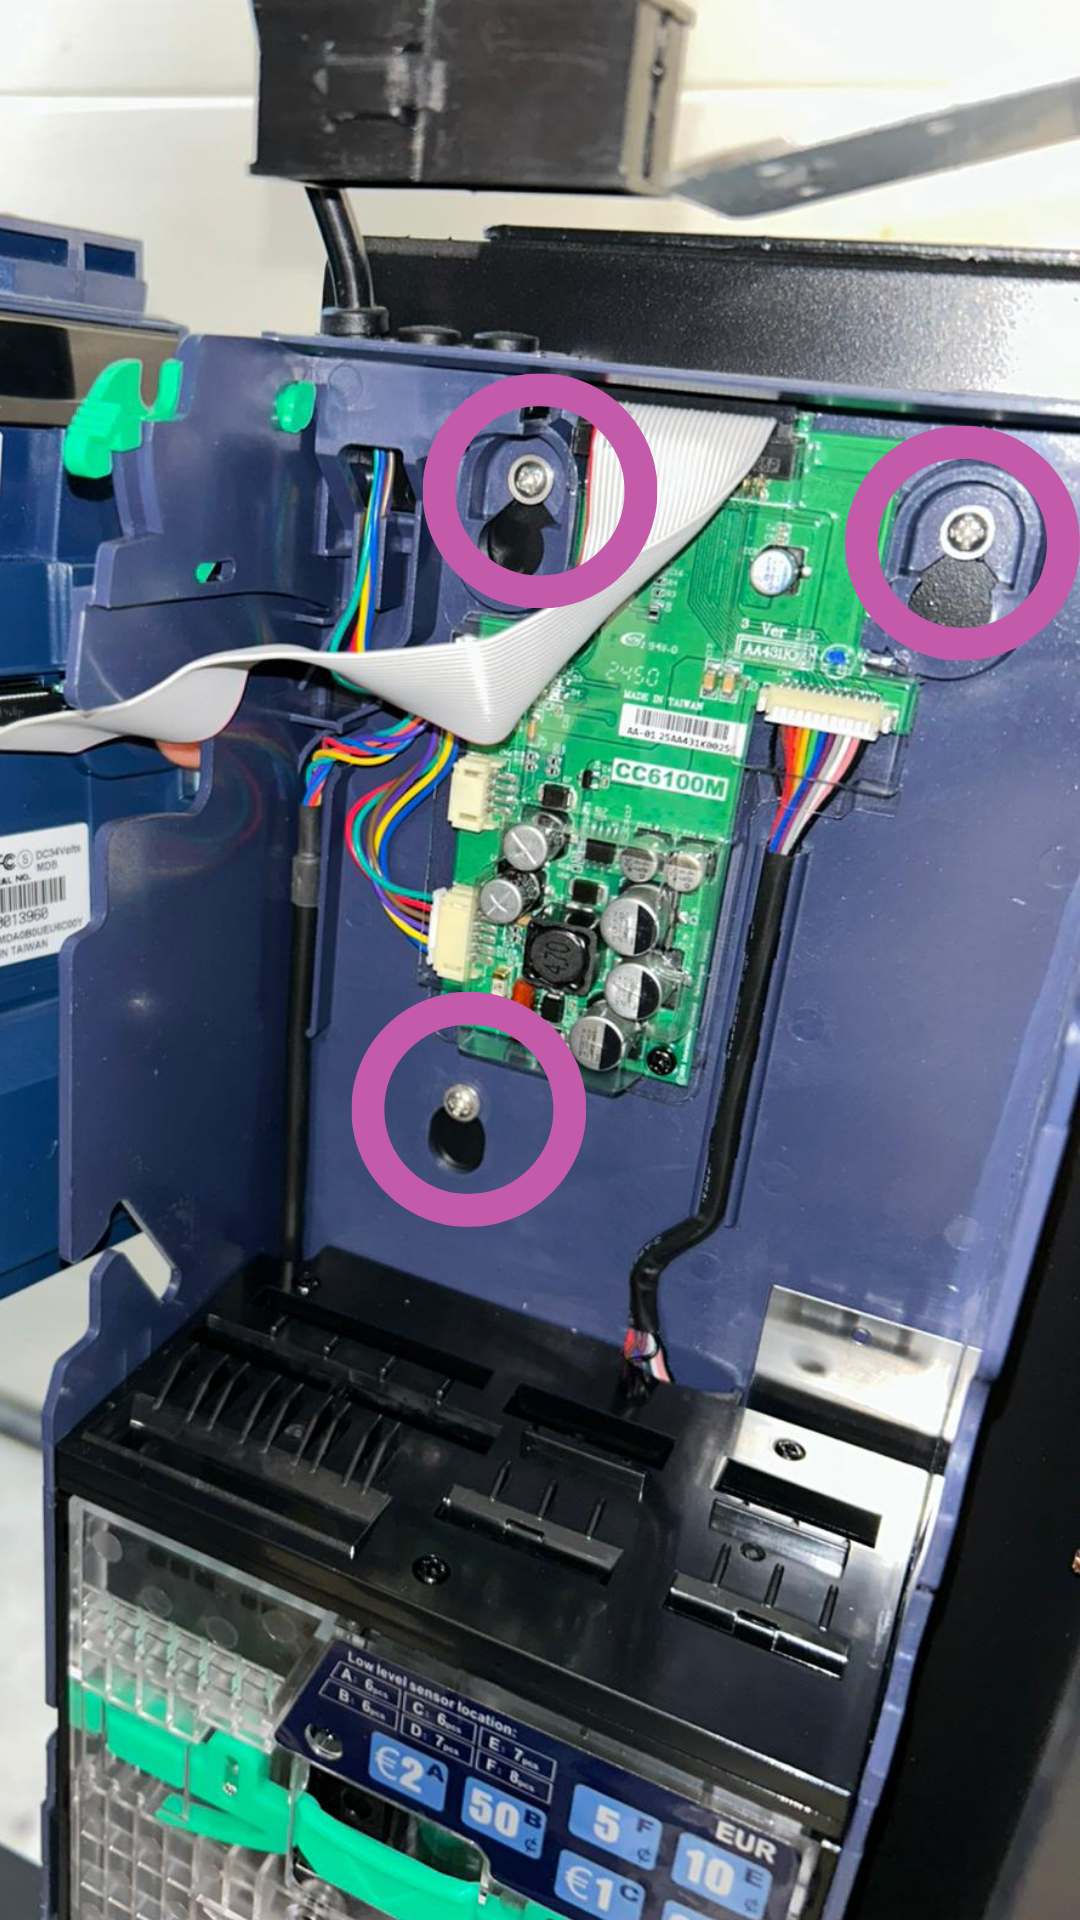
 Unscrew coin changer
(Image 4)
Loosen the three mounting screws (top left, top right, bottom center) with a Phillips screwdriver.
Carefully pull the device out to the front.
 Insert new CC6100
Insert the new coin changer into the same mounting holes.
Fix it again with the same screws.
Reconnect the cables in the same order:
Ribbon cable
Yellow power plug
Make sure all cables are free from tension (not pinched or twisted).
 Function test & calibration if needed
Restore power to the machines.
Coin changer starts with self-test (LED lights up briefly).
Check:
Display shows status
Coins are correctly accepted and identified
Refilling, Emptying and Calibrating the Coin Changer
The coin changer is a central part of your machine. You need to do these steps to get your coin validator working.
 Note
NoteIf there is no communication after replacement (error code or no response):
Check plug connections (correct polarity, secure fit)
Check MDB/Executive setting in the machine's menu